15+ Default settings that you can change in Excel
When you run Excel there are few things that seem to be static in Excel’s interface and settings. But believe it or not majority of them are customizable to great extent thus adding more to users’ ability.
Following is the roundup of settings and items that we will learn how to change/customize in this tutorial set:
 1 Change grid line color
Bored of gray grid lines? You can have your own color as grid lines.
Go to file > option > advanced > scroll down to display options for this worksheet > select the one you like from grid line color selector
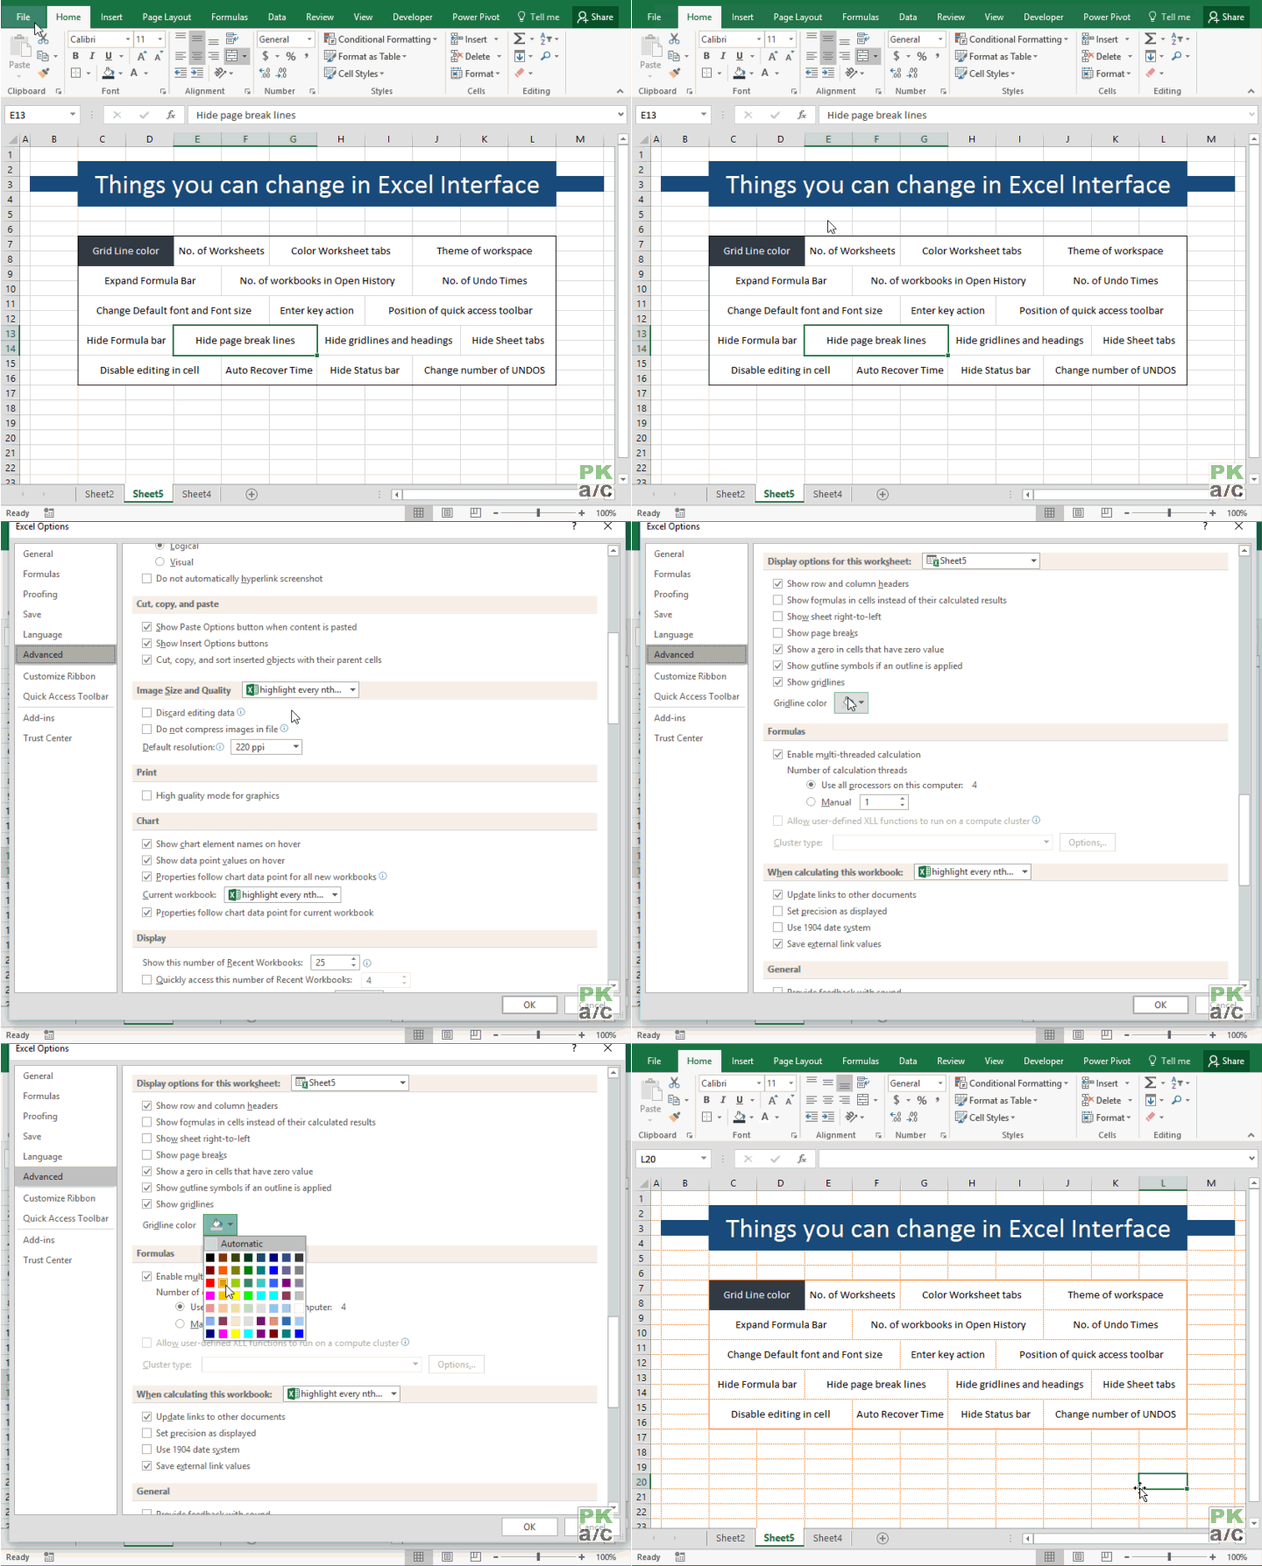
Remember this change only applies to that specific worksheet.
2 Change number of worksheets
By default when you open a new workbook there are THREE worksheets. You can increase or decrease the number as you desire. For example, I have set it to just one. The maximum you can have are 255 worksheets.
Go to File > Options > General > When creating new workbooks > change the number to your desire under “include this many worksheets”

3 Color worksheet tab
Not many know this but you can color woksheet tabs to easily identify them. And its a simple thing to do as well. Just right click > hover on tab color option > select the desired color.
You will see the selected color better once you have another tab active.

4 Change Excel theme
Yes it is a thing! And yes you do have different themes in Excel. Though not many options are available, but still before monotony starts hurting your eye balls any kind of change is good enough!

5 Hiding ribbon
Ribbon is one of the most flexible item in interface you have that you can expand or collapse to make more space for your work.
To hide the ribbon and keep just the tabs simply double click on active tab and see it going up! Also you can click the collapse button at the bottom right corner of the ribbon or hit CTRL+F1.

However, if you want to completely hide the ribbon then you have to use the ribbon display options button just at the left of application window control buttons and use the first option as shown in the following figure:
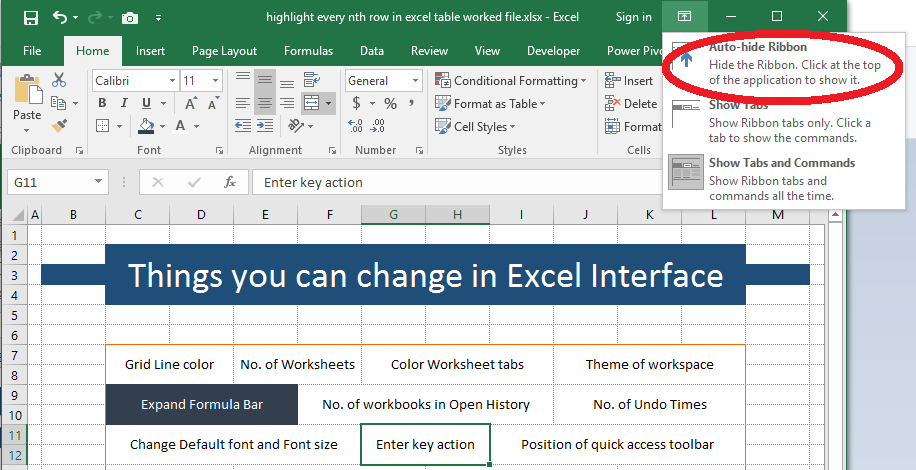
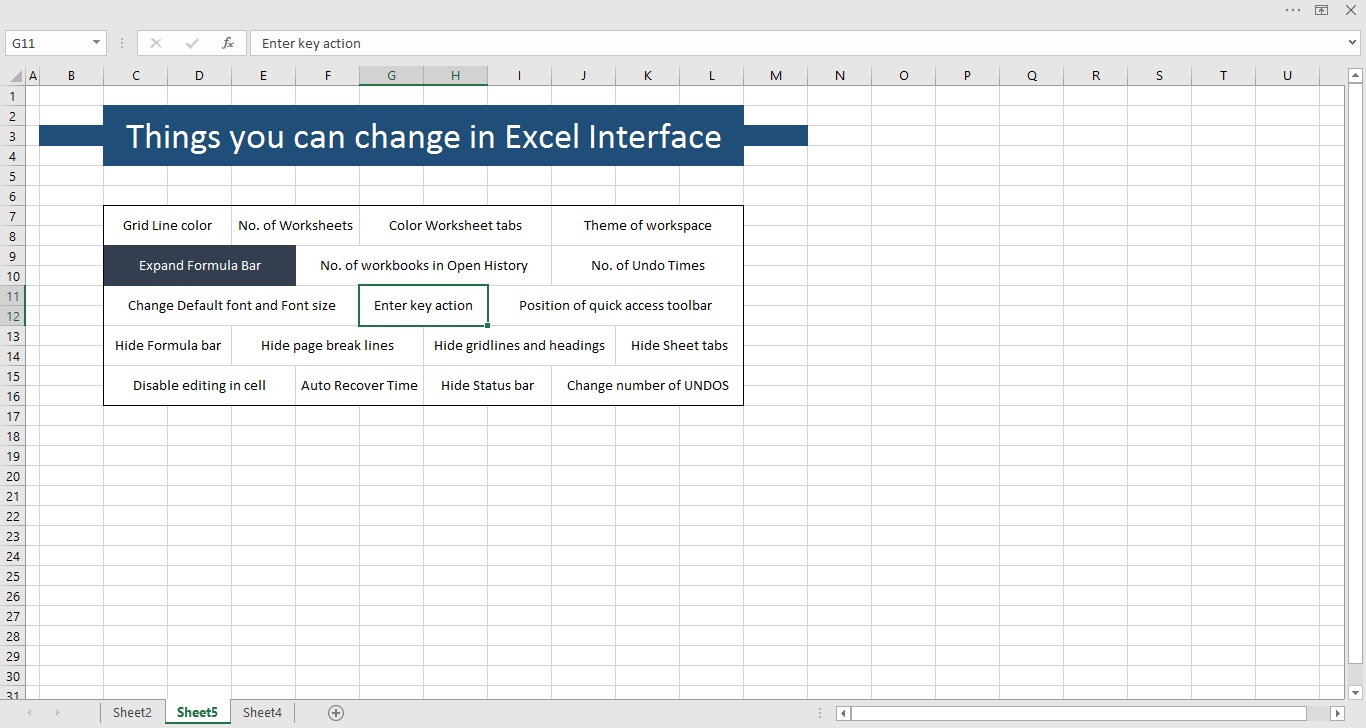
To have this option activated, Excel window has to be maximized. Once activated, your excel interface will be as following:
6 Expand formula bar
While writing wrong formulas, in default position of formula bar, it starts scrolling the text to left as you continue to type. The best way to avoid it and see the whole formula you are writing is to expand the formula bar and you can do it by simply dragging the bottom edge of formula bar down.

Or you can use the button at the right corner of the formula bar to expand and collapse the formula bar:

7 Number of workbooks you can see in history
Probably not important for some but its quite a facility for many who have to open some files on daily basis. But by default the count is quite small but you can easily increase it to 50. It will save you from opening file from actual location or managing their shortcuts on desktop.
Go to file > option > advanced > scroll down to display options > change the number in “show this number of recent workbooks:”

8 Number of UNDO levels
Though the number of UNDO that you can perform in Excel is quite high by default but if you want to increase or decrease it then it is definitely possible. But for that you have access Window’s registry instead of fiddling with Excel options.
WARNING: Any mistake in Windows registry can render operating system broken. So if you don’t understand the steps DON’T proceed.
Click start button > click run > in the input field type regedit and press enter. It will open Windows registry. Now you have to access the right folder. Open folders in the following order:
HKEY_CURRENT_USER > Software > Microsoft > Office
Now depending on your active Office version you have to access the right folder. For 2016 version it is 16.0. From there access folders as follows (I am mentioning the whole string)
HKEY_CURRENT_USER > Software > Microsoft > Office > 16.0 > Excel > Options
Once there, Click edit button and hover over new and then select DWORD value. Give it a name UNDOHistory or UNDOLEVELS and press Enter.
Right click on newly added value and click Modify. Select decimal under the base and in “value data” field mention any value between 0 to 100. Click OK and close the registry window.
Restart Excel to make sure the changes take effect.
9 Change default font and font size
By default font is Calibri in I think all of the Office suit applications. And font size is set to 11 guess. Well at least this is the case with me. But if you want to change any or both of these two then you can easily do it.
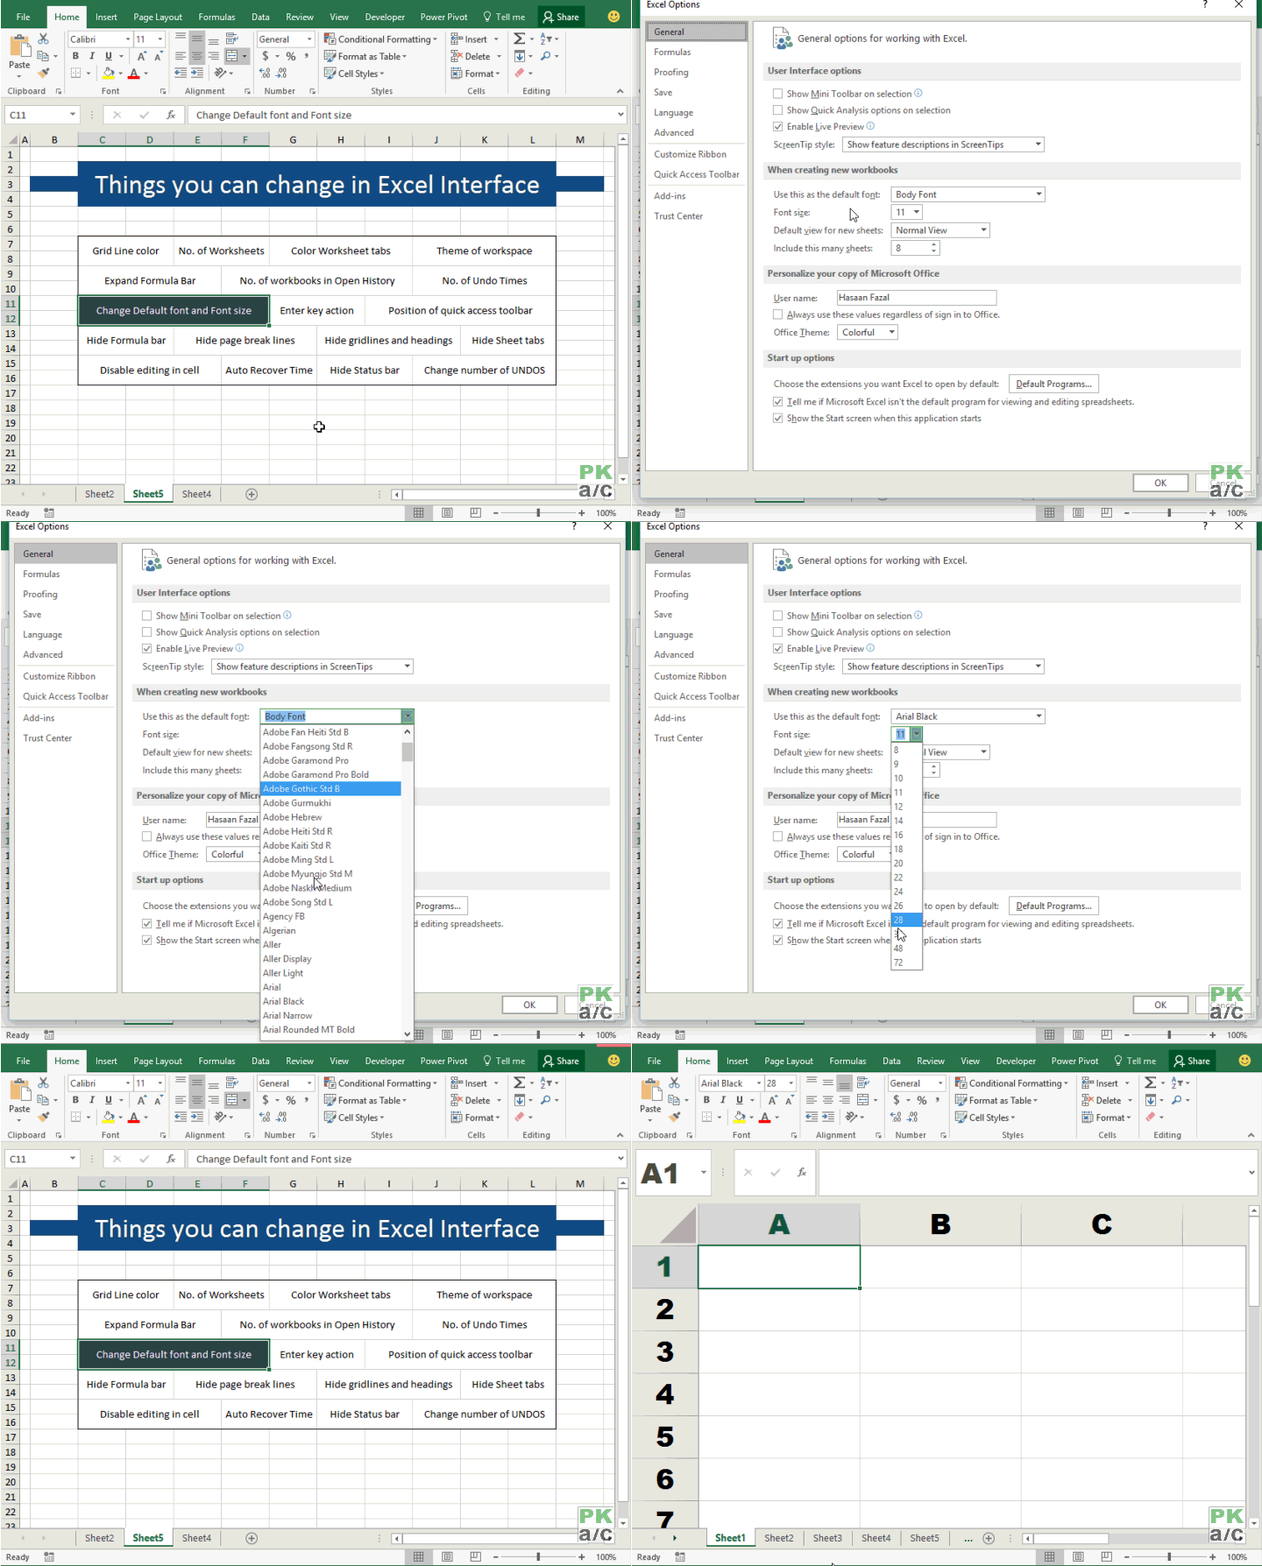
Note that you have to close the Excel application and this change will only take effect on new workbooks created.
10 how enter key press should work
By default when Enter key is pressed it moves the selection down. But you can change it any direction! Left, Right and even Up!

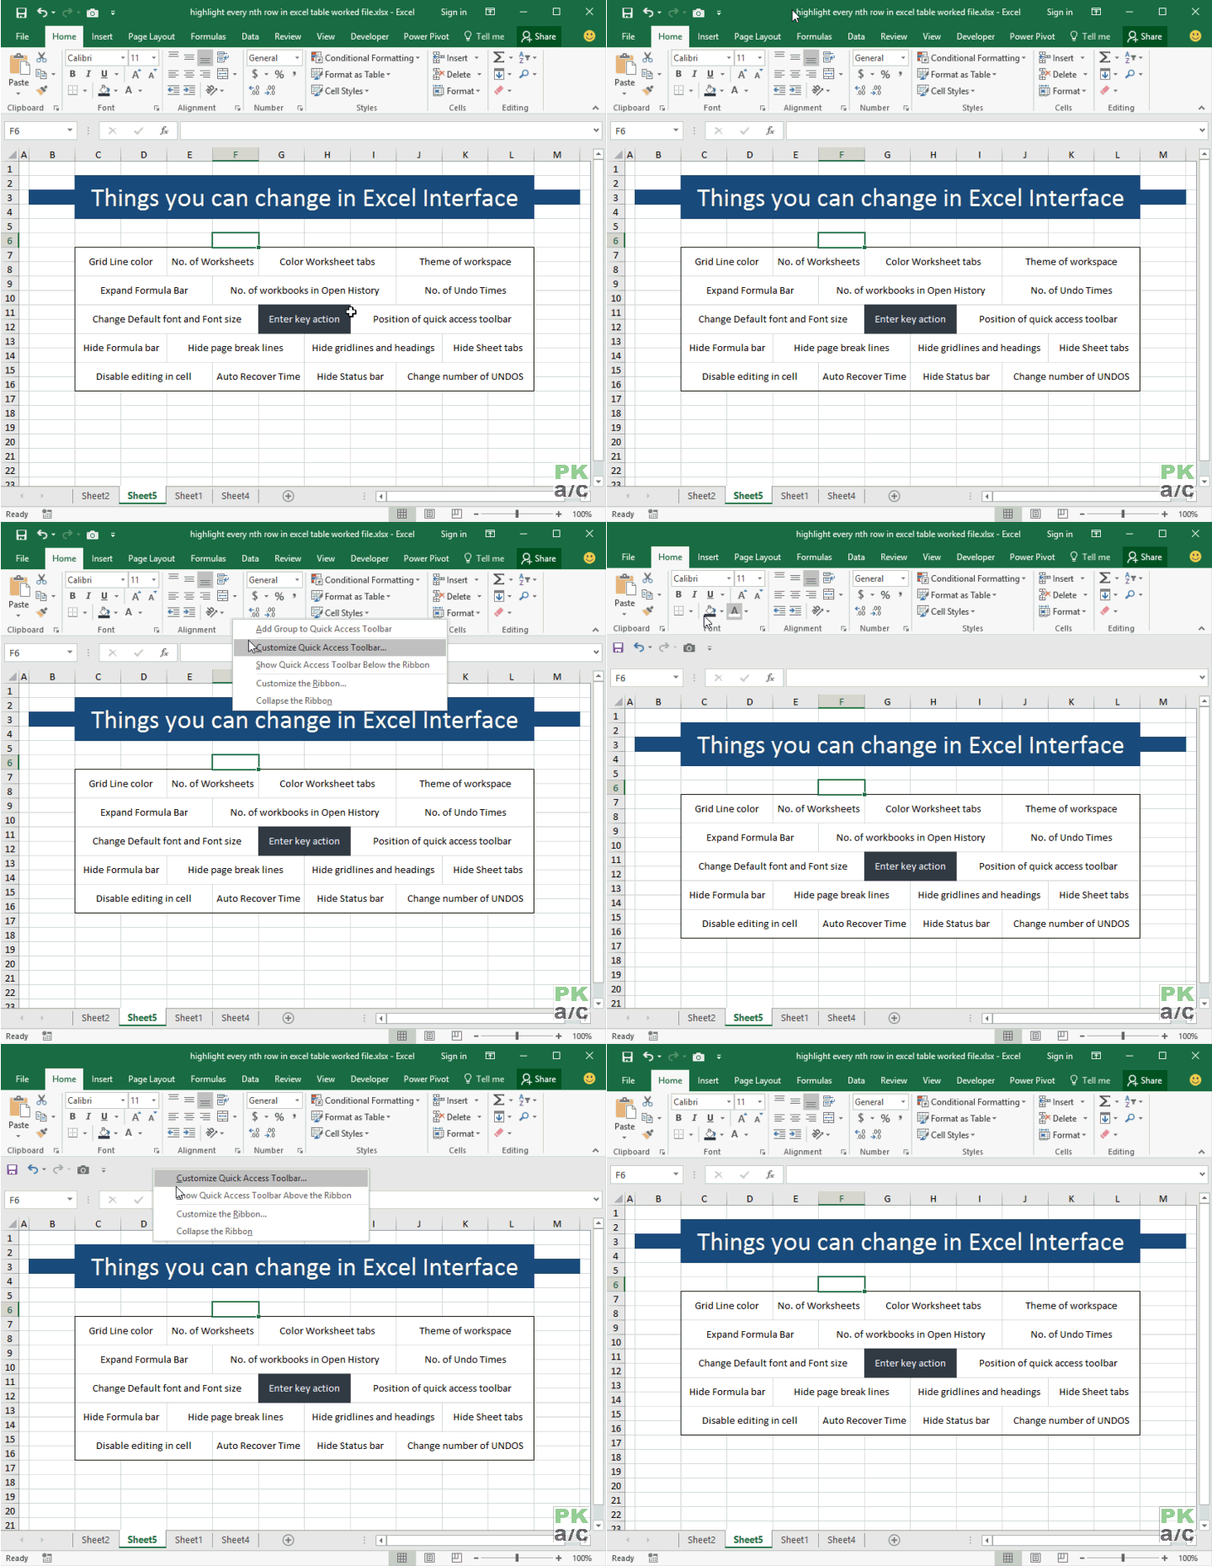
11 change position of quick access toolbar
Yes that tiny strip on top left does have a name and its quite an amazing feature too if one knows how to use it. It can make Excel experience even more efficient. Check out this tutorial to learn more: Excel Custom Shortcuts – Reaping real benefits of Quick Access Toolbar
Coming back to the topic, you can change its position as well and can make it appear after formula bar. Just click anywhere on the ribbon and select “show quick access toolbar below the ribbon”
12 hide formula bar
As you can see the formula right in the cell, most users prefer to have formula bar disabled or hidden. This allows for more on-screen-real-estate to work on.
To hide the formula bar go to view tab > show group > uncheck formula bar

13 hide page break lines for forever!
I hate them personally. If I ever change the page layout or try to set margins within Excel then they never disappear until you close the workbook and reopen again. If there is any other way then the one I am discussing as follows let me know!
Go to file > advanced > scroll down to display options for this worksheet > uncheck “show page breaks”

14 Hide grid lines and headings
Not fond of grid lines and headings? You can turn them off. This usually is the case when you are giving presentation on projector straight from Excel file. Hiding the unnecessary bits make the presentation cleaner and more focused.
Go to view tab > show group > uncheck heading and grid lines.

15 Hide worksheet tabs
This may very well be a good prank to pull on your friends and colleagues as I dont know why would someone turn it off but again may be for presentation or to disable the access to other worksheets without locking them this may be work as a solution.
Go to File > Options > Advanced > Scroll down to display options for this workbook > uncheck show sheet tabs.

16 Disable in-cell editing
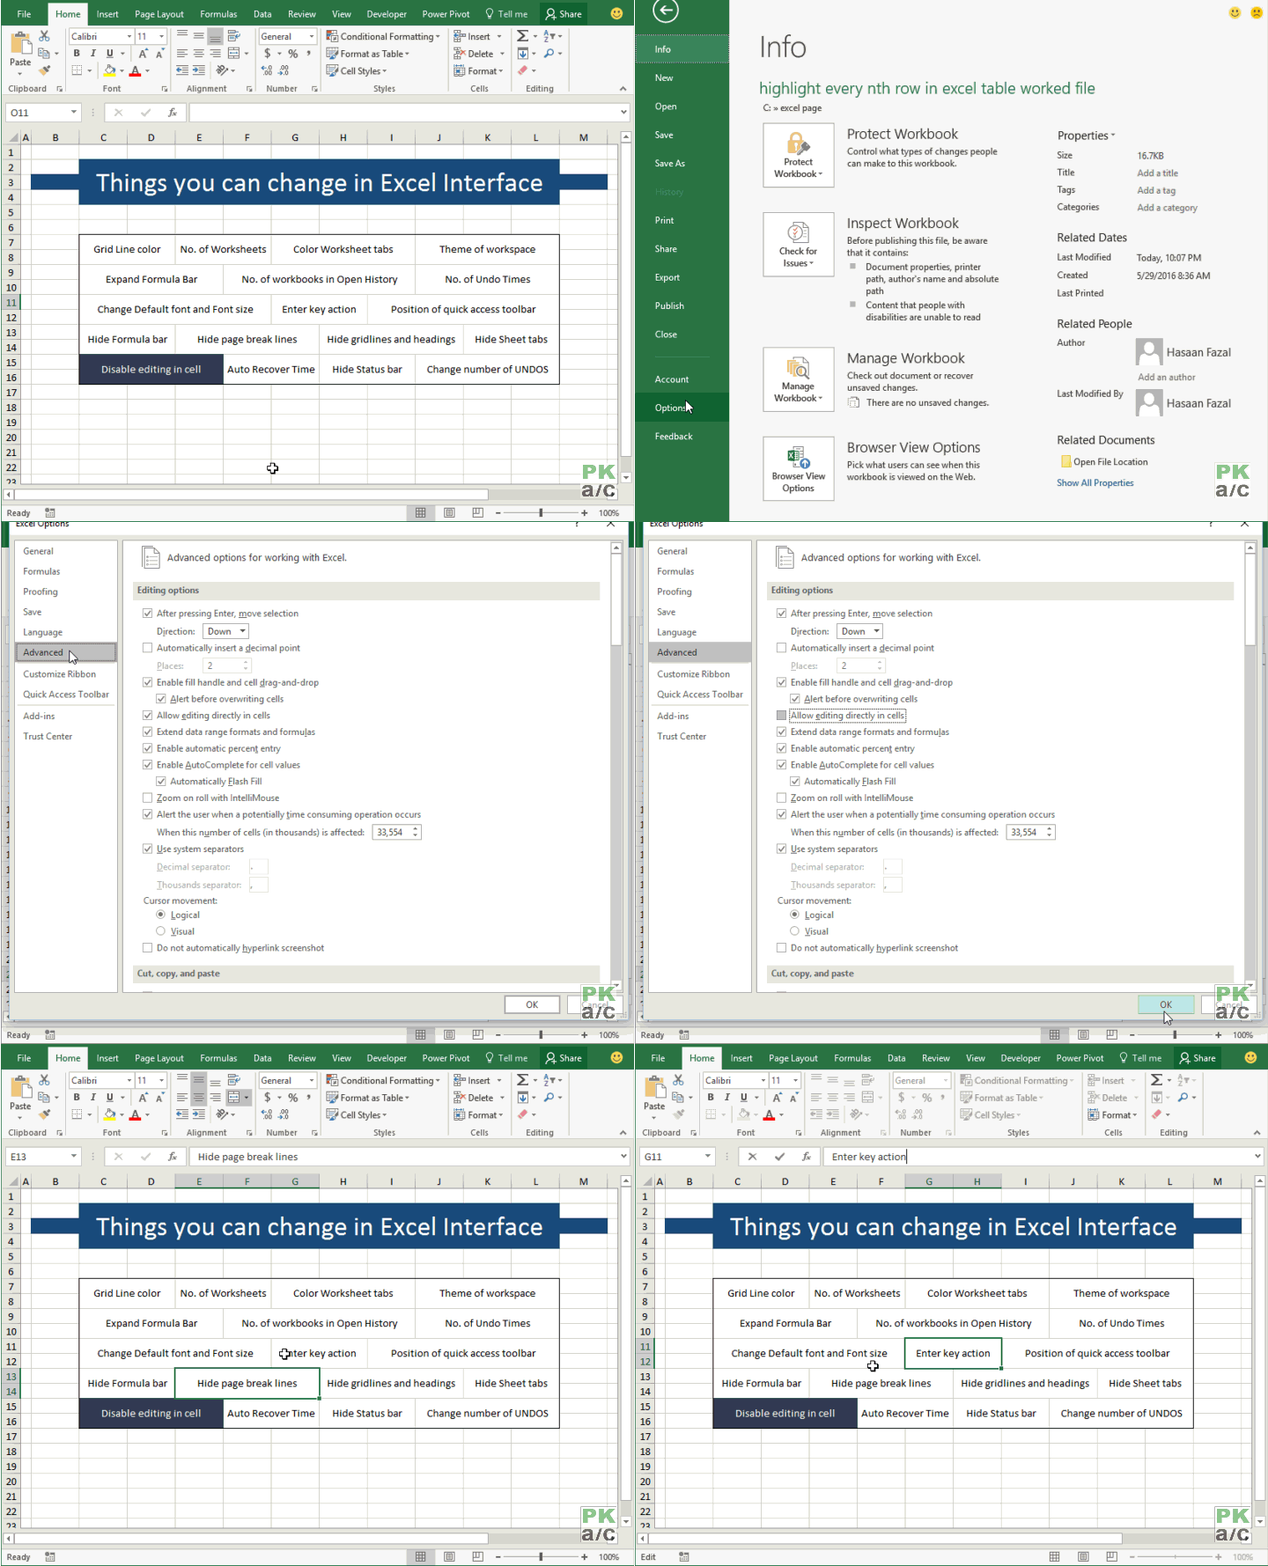
OK first things first, its about disabling “edit mode” and not like locking the cells altogether. Edit mode changes the way cells behaves while you are editing it.
If you disable editing in cell, what I reckoned is that you can’t enter edit mode with mouse. And you have to press F2 to enter edit mode compulsorily or you have to click in formula bar to edit the existing content otherwise it will simply overwrite whatever you type.
This option comes in handy when you want avoid accidental clicks to ruing your worksheet especially if you have a mouse with a broken chord or not so reliable track pad.
In the following animation when I was moving from one cell to the other I was basically double clicking each cell but it wasn’t letting me edit it until I clicked in the formula bar.
17 Change autorecover time
By default auto recover time is 10 minutes i.e. Excel generates a temporary file every 10 minutes that can be used to recover your data if Excel or system crashes for any reason. If you think your system is reliable you can increase this time or if you think your data is crucial and backup should be made frequently you can decrease the time.
Go to File > Options > Save > Under save workbooks > change save autorecover information time.

18 Hide Status bar
There is no option available in Excel interface to hide the status bar itself. One indirect way is to activate auto-hide ribbon option. This will not only hide status bar but also ribbon.
But if you want only status bar to be hidden then you need put a small code in VBA for that particular workbook. To enter VB environment hit ALT+F11 and hit CTRL+G. This will invoke the immediate window. Put the following code in it and hit Enter key:
application.DisplayStatusBar = False
This will immediately hide the status bar for current and other workbooks. To enable again just turn the argument back to TRUE.

19 Change ruler units
By default, Excel rules are based on Inches but you can change it to millimeters or centimeters.
Just go to File > option > advanced > scroll down to display > select the appropriate unit from drop down of “ruler units”


Leave a Comment