Master Excel Tables With These 10 Shortcuts
Master Excel Tables With These 10 Shortcuts
If you work with Excel Tables often, you're going to want to memorize several of the following shortcuts to make your life easier. These shortcuts are for both mouse and keyboard and can be used on Windows or Mac.
1. Selecting Rows and Columns
To select a column in an Excel Table, hover over the top half of column's header cell, until your cursor becomes a down arrow. Then left-click and it will select all of the cells in that column. (If you left-click a second time, it will include the header cell in your selection.)
The keyboard shortcut for selecting a column in Excel tables is Ctrl + Space.

In the video above I mention a small nuance with Ctrl + Space. If you have the cell in the first row of the body of the table selected, Ctrl + Space will scroll down to the bottom of the table. You can press Ctrl + Backspace to scroll up and activate the first cell in the selection/column. If you have a cell in any subsequent row selected, Ctrl + Space will NOT scroll down. Another weird but possibly useful quirk of Excel tables…
To select a row, hover your cursor near the left border of the table until it becomes a right-pointing arrow; then left-click.
The keyboard shortcut is Shift + Space.

2. Selecting the Entire Table
To select the data for the entire table, you can press Ctrl + A. This highlights everything except the header and total rows. If you'd like to include those rows as well, simply press Ctrl + A a second time.

3. Moving Columns
To move a column, select the header cell in the column that you want to move. Then hover your cursor over the border of that cell until the cursor becomes a crosshairs.

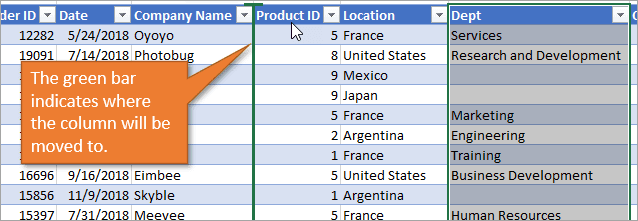
Then drag it to where you want it to go, keeping the cursor in the header row. A vertical green bar will appear between columns as you drag the cursor to indicate where the column will end up when you release the mouse.

Moving rows is similar. Essentially, you follow the same process, but you drag your row (or rows) up or down instead of left/right.
4. Autofitting Column Widths
To resize the widths of the columns so that the cells in the table display all of the contents, use this shortcut. First select all of the table contents (see Shortcut 2 above), including the header and total rows. Then select Autofit Column Width in the Format drop-down menu on the Home tab.
The keyboard shortcut for this is Alt + H O I.

Autofitting is a great technique to use after you have inserted, deleted, or moved columns in a table, since the column widths do not automatically resize.
I don't know of a Mac equivalent for this keyboard shortcut, so you'll have to use the Format menu option on the Home tab.
5. Inserting/Deleting Rows and Columns
To insert a row, start by selecting any cell in the table. The inserted row will be above that cell. Then type Ctrl + +. (If you are using a laptop, you may need to hit Ctrl + Shift + +.)
Deleting a row is similar. Start by selecting any cell in the row you want to delete and then hit Ctrl + -.

For inserting or deleting columns, the commands are the same. However, you first start by selecting two or more cells in the same column, then press Ctrl + + or Ctrl + -.
You can also select the entire row or column before pressing the shortcuts, but it is not required.
6. Open the Filter Drop-Down Menu
To open the filter drop-down menu, press Alt + ↓ if your cursor is on the header cell.

If you have a cell selected further down the column, just hit Shift + Alt + ↓. This will open the filter drop-down menu without having to scroll back up to the header cell.
7. Toggle the Total Row
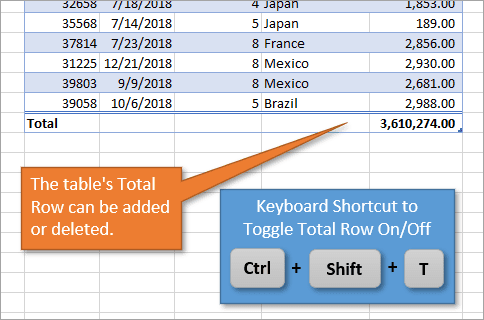
On an Excel Table, you can add or delete a Total Row at the bottom really easily. To toggle the row on and off, just hit Ctrl + Shift + T.

8. Renaming a Table
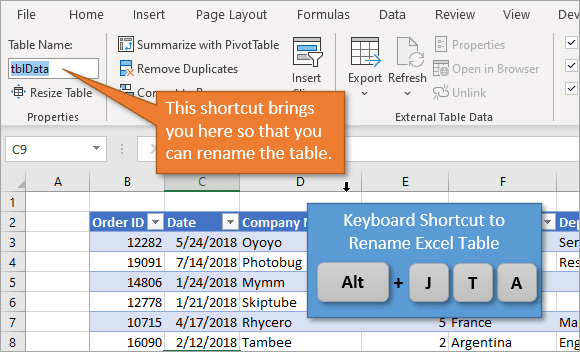
To rename a table, just use keyboard shortcut Alt + J T A. That will set the focus on the Table Name box in the ribbon so that you can update the name.

This shortcut is only available on Windows.
9. Insert a Table
Turning your data into an Excel Table is really easy when you use the shortcut Ctrl + T. This will bring up the Create Table window, including what Excel assumes the boundaries for your table should be. If those look right, you can just hit OK, and it will format your data as a table.

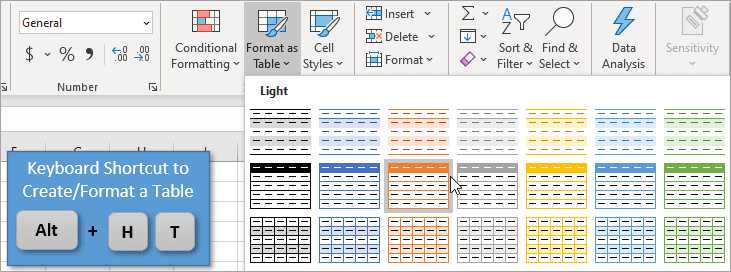
If you'd like to select different formatting for your table when inserting it, you can instead use the shortcut Alt + H T. (This shortcut is only for Windows.) This brings up a menu of formatting options and you can select whichever you like best.

Checkout this post & video on Tips & Shortcuts for Inserting Excel Tables to learn more.
10. Refresh a Query
If your table is connected to a query through Power Query, you can refresh it by hitting Alt + F5.

You can also right-click the table and select Refresh.


Leave a Comment