VBA code to Sort Worksheets in Excel
If you work with a lot of worksheets in Excel, you would know the management of it can become an issue.


📤You download App EVBA.info installed directly on the latest phone here : https://www.evba.info/p/app-evbainfo-setting-for-your-phone.html?m=1
Once you have more than a couple of worksheets, you need to manually arrange these.
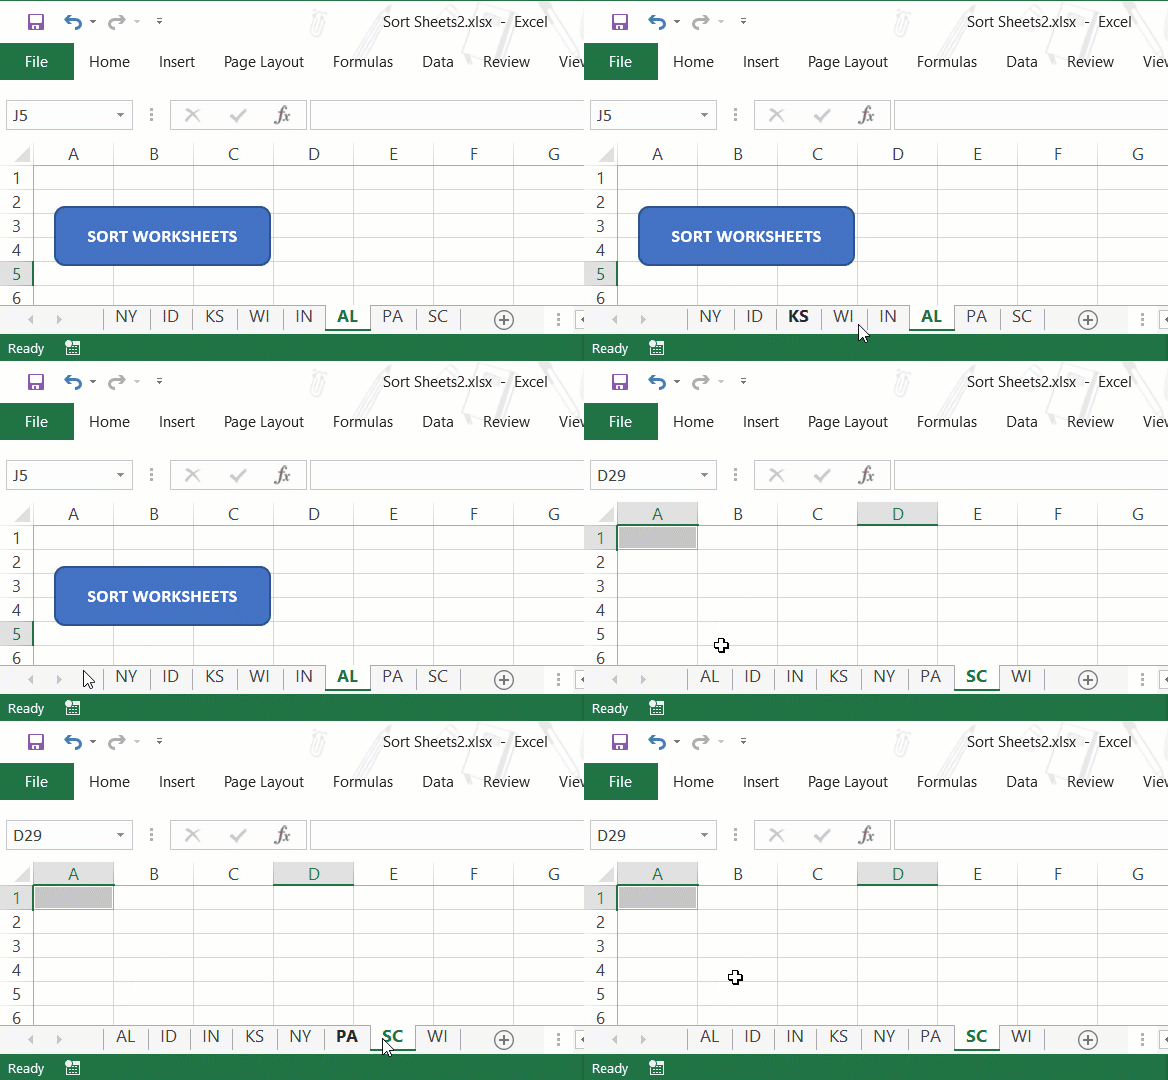
How easy would it be had there been a way to quickly sort the worksheets in Excel.
While there is no inbuilt feature way to do this, it can be done (easily) using VBA.
In this tutorial, I will give you the code and the exact steps you need to follow to sort worksheets in Excel.
You can tweak the code to sort the worksheets in an ascending or descending order.
VBA code to Sort Worksheets in Excel
Below is the code that will sort the worksheets in an alphabetical order as soon as you run it.
Sub SortWorksheetsTabs()
Application.ScreenUpdating = False
Dim ShCount As Integer, i As Integer, j As Integer
ShCount = Sheets.Count

For i = 1 To ShCount - 1
    For j = i + 1 To ShCount
        If UCase(Sheets(j).Name) < UCase(Sheets(i).Name) Then
            Sheets(j).Move before:=Sheets(i)
        End If
    Next j
Next i

Application.ScreenUpdating = True
End Sub
The above is a simple code that uses to For Next loops to analyze each worksheet against all the worksheets.
It compares the name of a worksheet against all the worksheets and moves it based on its name in the alphabetical order.
It then moves on to the next worksheet and then checks it against all the worksheets.
This process is repeated for all the worksheets and the final result is an order of worksheet sorted in an alphabetical order.

A few important things to know about this code:
- UCase function is used to make sure that the lowercase and uppercase are not treated differently.
- The value of Application.ScreenUpdating is set to False at the beginning of the code and changed to True at the end of the code. This ensures that while the code is running, you don’t see it happening on the screen. This also helps speed up the code execution.
If you want to sort worksheets in a descending order, you only need to change the < (less than) sign with the > (greater than) sign.
The below code would sort the worksheets in descending order:
'This code will sort the worksheets alphabetically
Sub SortWorksheetsTabs()
Application.ScreenUpdating = False
Dim ShCount As Integer, i As Integer, j As Integer
ShCount = Sheets.Count
For i = 1 To ShCount - 1
    For j = i + 1 To ShCount
        If UCase(Sheets(j).Name) > UCase(Sheets(i).Name) Then
            Sheets(j).Move before:=Sheets(i)
        End If
    Next j
Next i
Application.ScreenUpdating = True
End Sub
You can also give the user the option to choose whether he/she wants to sort in ascending/descending order.
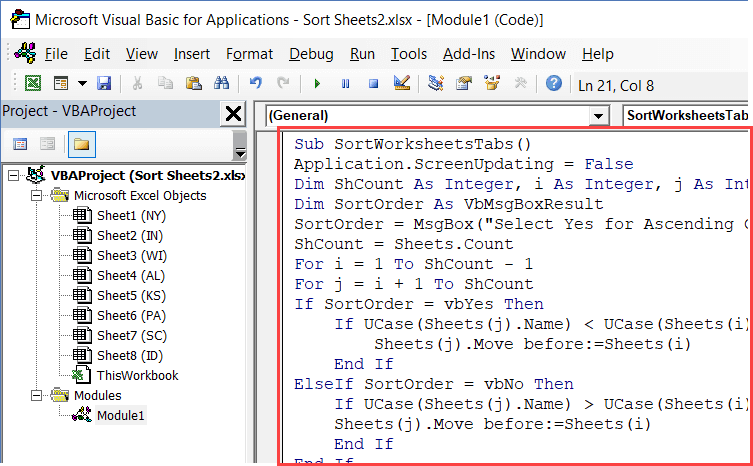
The below code would show a message box and the user can select the order to sort.
Sub SortWorksheetsTabs()
Application.ScreenUpdating = False
Dim ShCount As Integer, i As Integer, j As Integer
Dim SortOrder As VbMsgBoxResult
SortOrder = MsgBox("Select Yes for Ascending Order and No for Descending Order", vbYesNoCancel)
ShCount = Sheets.Count
For i = 1 To ShCount - 1
For j = i + 1 To ShCount
If SortOrder = vbYes Then
    If UCase(Sheets(j).Name) < UCase(Sheets(i).Name) Then
        Sheets(j).Move before:=Sheets(i)
    End If
ElseIf SortOrder = vbNo Then
    If UCase(Sheets(j).Name) > UCase(Sheets(i).Name) Then
    Sheets(j).Move before:=Sheets(i)
    End If
End If
Next j
Next i
Application.ScreenUpdating = True
End Sub
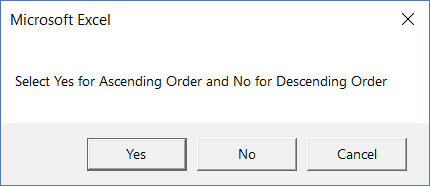
The above code when executed shows a message as shown below. It sorts based on the selection (Yes for Ascending and No for Descending).
In case you click Cancel, the code stops and nothing happens.

Note: The sorting cannot be undone. In case you want to keep the original order as well, make a copy of the workbook.
A word of caution: The above code works in most of the cases. One area where it will give you the wrong result is when you have tab names such as Q1 2018, Q2 2018, Q1 2019, Q2 2019. Ideally, you would want all the tabs for same years to be together, but it won’t be done as Q1 2019 will be placed before Q2 2018.
Where to Put the VBA Code
Excel has a VBA backend called the VBA editor.
You need to copy and paste the VBA code into the VB Editor module code window.
Here are the steps to do this:
- Click the ‘Developer’ tab. (Can’t see the developer tab? Click here to learn how to get it).

- Click on Visual Basic option. This will open the VB editor in the backend.

- In the Project Explorer pane in the VB Editor, right-click on any object for the workbook in which you want to insert the code. (If you don’t see the Project Explorer go to the ‘View’ tab and click on ‘Project Explorer’.)
- Go to Insert and click on Module. This will insert a module object for your workbook.

- Copy and paste the code in the module window.

How to Run the VBA Code
In Excel, there are various ways to run the VBA code.
You can run the code right from the Visual Basic Editor (also called the VB Editor).
You can insert a button or a shape in the worksheet and assign the macro to it. When you click on the button, it will run the macro instantly.
You can also add the macro to the Quick Access Toolbar (QAT). Now whenever you have to sort the worksheet tabs, you can just click on the macro code icon in the QAT.
#evba #etipfree #kingexcel📤You download App EVBA.info installed directly on the latest phone here : https://www.evba.info/p/app-evbainfo-setting-for-your-phone.html?m=1


Leave a Comment